Add Modifiers to an Item
Modifiers give your team options to adjust an item based on customer requests.
-
Go to Configuration > Modifiers and click + to create a new modifier.
-
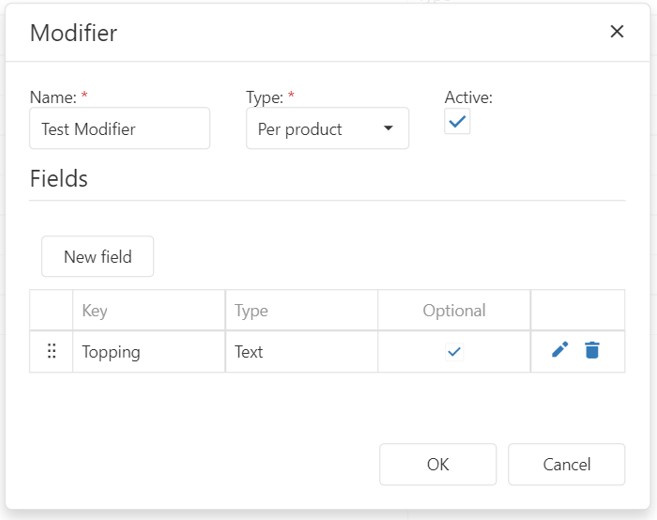
In the Modifier window, make sure the new modifier has a Name, and Type;
- Per Unit- Applies the modifier to the item
- Per Sale- Applies the modifier to the entire sale
Set the modifier to Active using the checkbox.
-
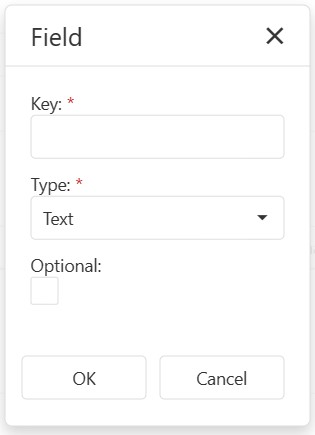
To add a modifier field, click New field. Under Key add the name of the field, and then choose a Type from the drop-down menu. Use the Optional checkbox to set whether the field is a mandatory selection or optional.
-
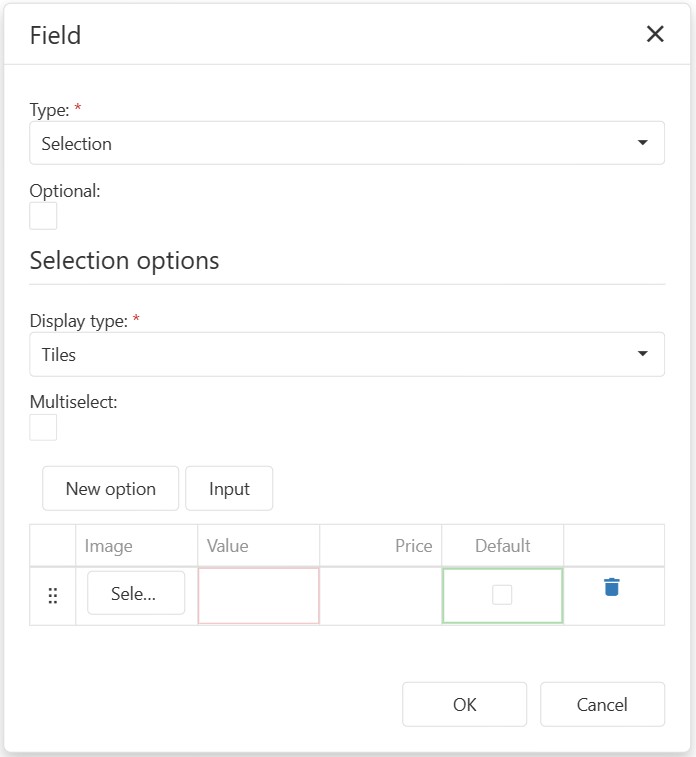
If you choose Selection from the “Type” list, the “Selection options” menu will expand. Set a “Display Type”, such as Tiles, then click New option and enter a Value. If you chose the selection “Image Tiles”, you can also add an image to the tile by clicking Select image. You can set the tile as Default using the checkbox or Delete it using the dustbin icon. Check the Multiselect checkbox if more than one option can be selected. Once you have added all your options, click OK to save the modifier fields.
-
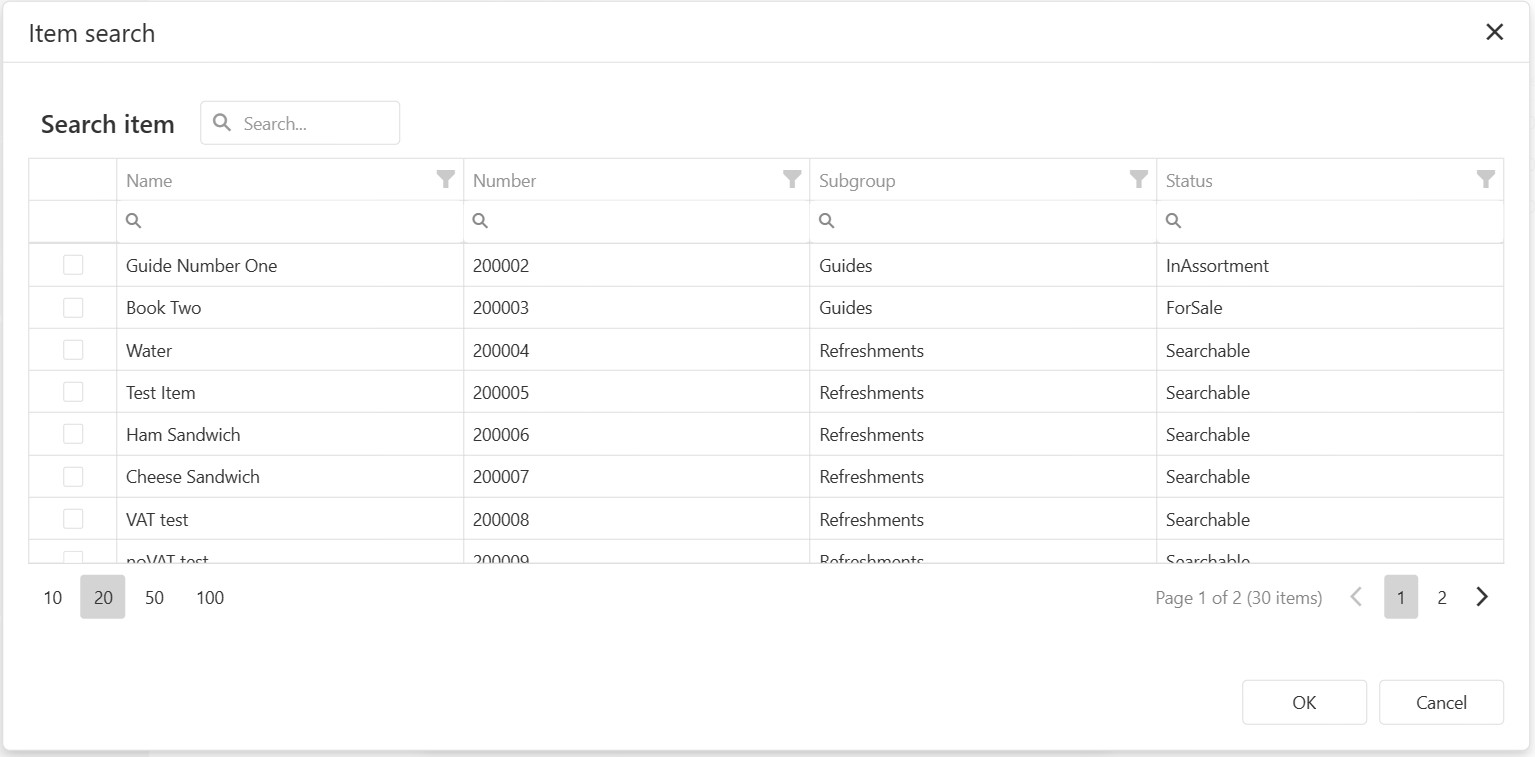
Click Assign items to assign this modifier to specific items, or Assign Subgroup to assign it to an entire Subgroup.
-
Once you are happy with your modifier, click OK to save it.
-
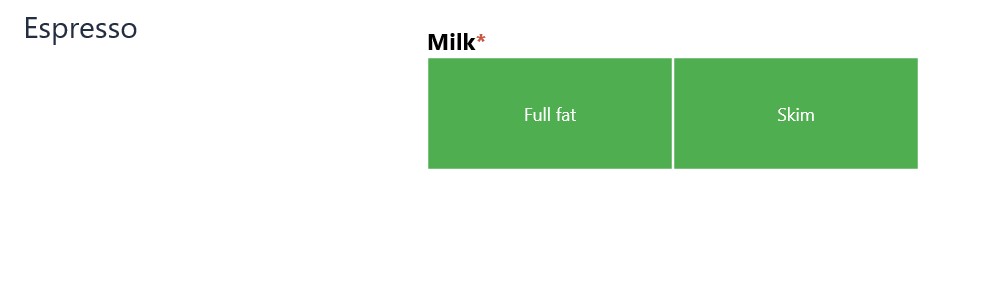
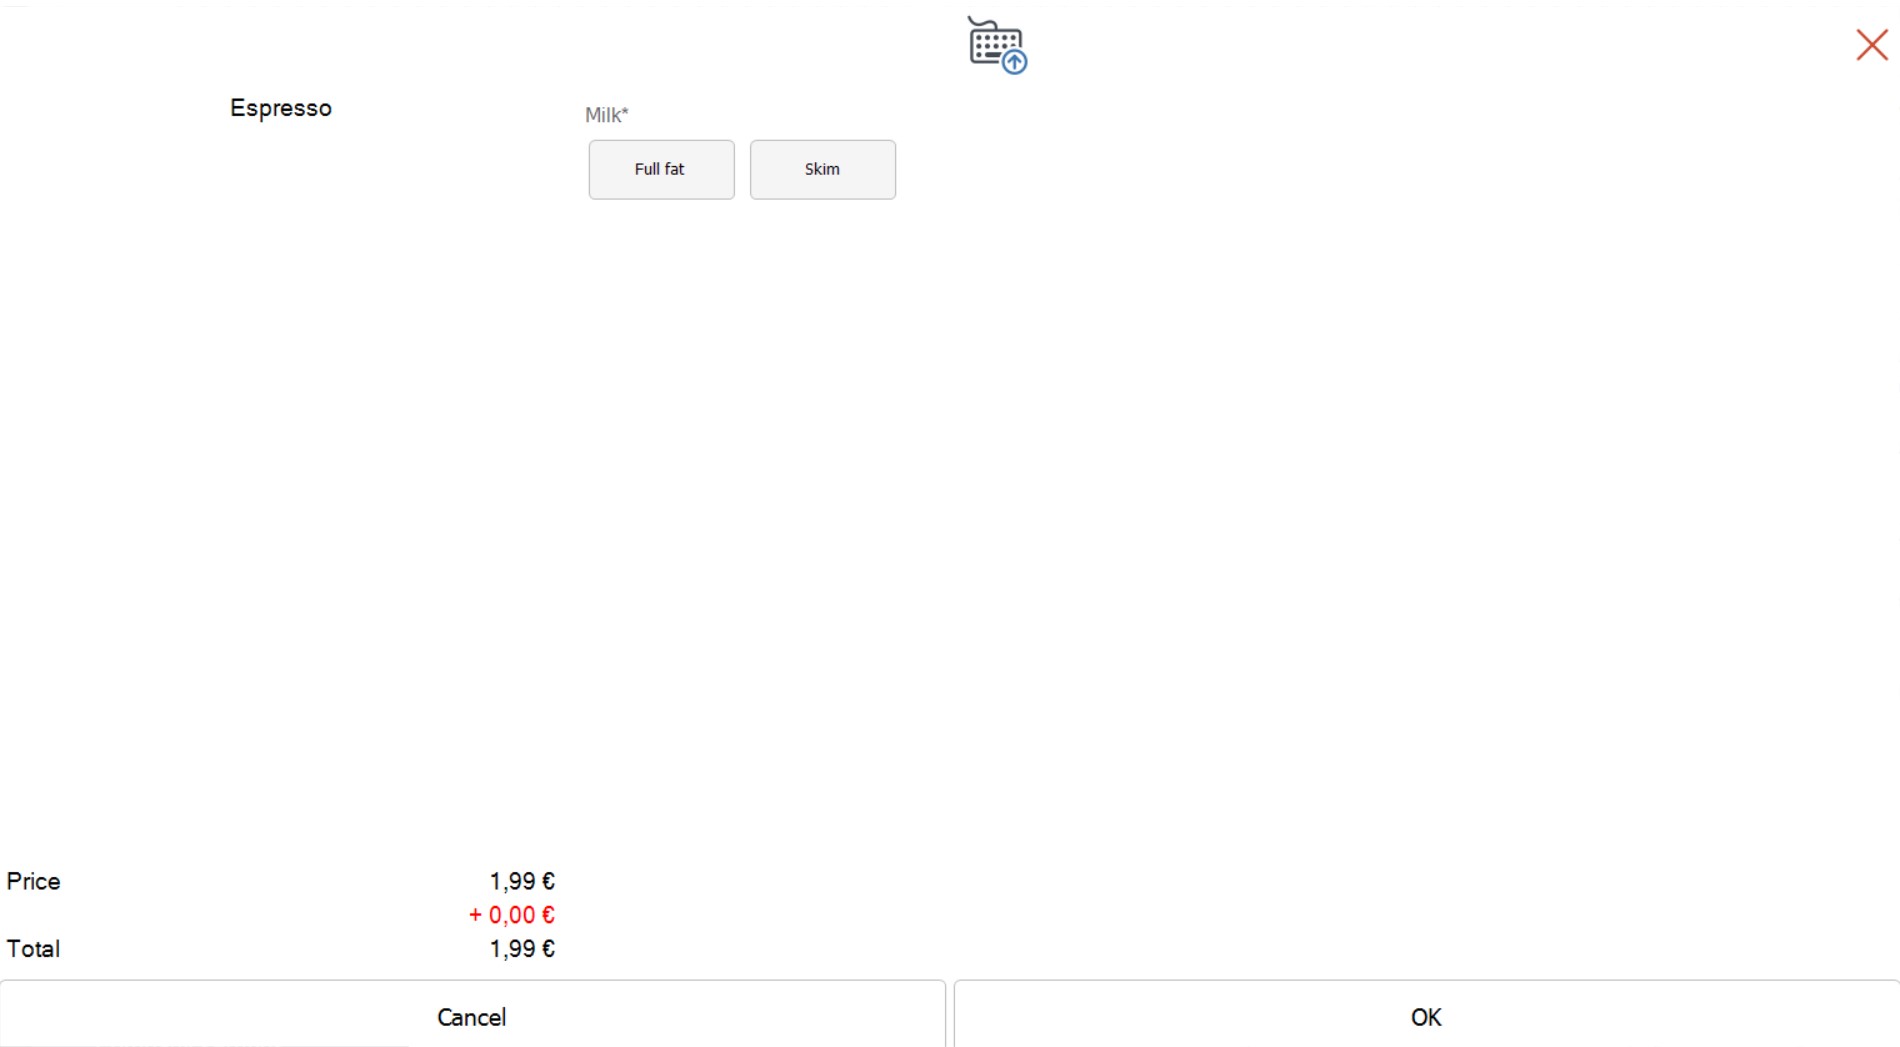
When an item with modifiers is sold, the modifier menu appears. The fields shown depend on the type and configuration of the modifier.
Modifiers screen when using Resolut POS:
Modifiers screen when using POS4:
-
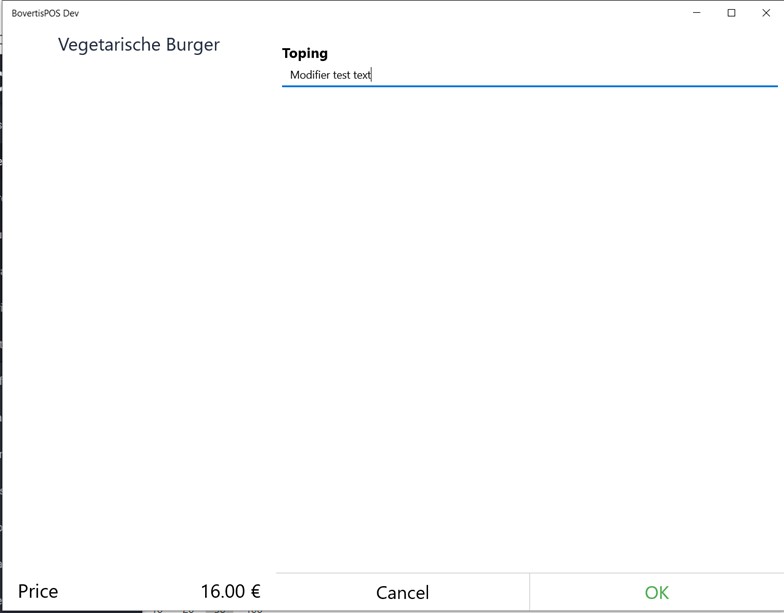
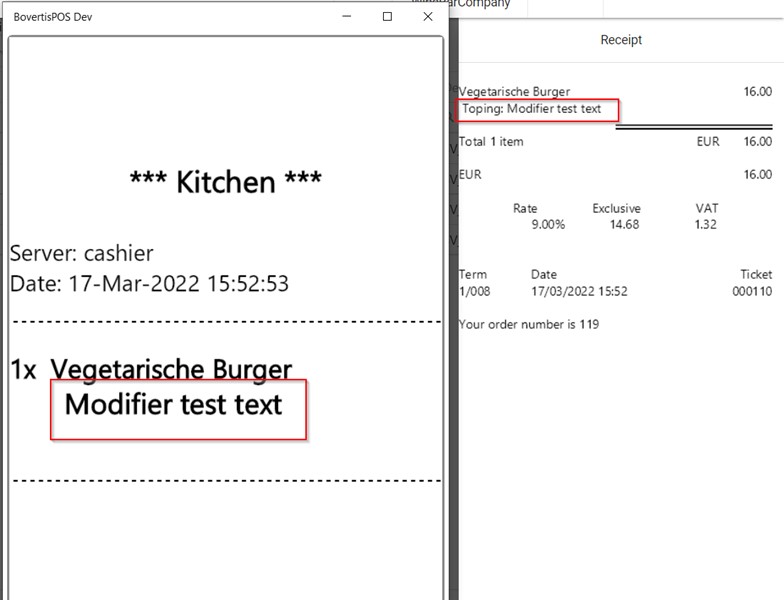
Modifiers are also shown on the kitchen ticket and receipt.
Editing and Deleting Modifiers
A list of all Modifiers is visible when you return to Configuration > Modifiers.
 You can edit a Modifier using the Edit pencil icon, or delete it from the Resolut Online Portal using the dustbin Delete icon.