Public Transport Card Reader Configuration
-
Add the Parameter to the Database
Copy the parameter PublicTransportPlugin.dll to C:\POS\Plugins, and add it to the POS database in the “Plugins” table
Public Transport parameters are loaded from QChessOvcSettings.xml. If needed, they can also be added manually to the POS4 parameters.
| ParameterName | Description |
|---|---|
PublicTransportWebUrl |
Example: https://xyz.nl/ |
PublicTransportRestUrl |
Example: https://xyz.nl/ovhost/rest |
PublicTransportMerchantCode |
Example: XYZ |
PublicTransportCashRegisterId |
Example: XYZACC01 |
PublicTransportReaderSerialNumber |
Example: XYZACC01 |
PublicTransportAllowPrintCardInfo |
default false - enable/disable card check when sending sales to POS from provider and printing card serial number and product info on receipt |
PublicTransportAllowQuickPaymentTypes |
default true - enable/disable quick payment buttons |
-
Install the card reader (Windows)
Note: you will need to use a real reader, not a simulator
Download, unzip and Install
CPR-USB-driver-build20161102.zip and Feig dependent libraries.zip
from our Public Transport folder.

Note: Contact our Support Team if you need access to this folder.
Insert the Feig Reader into a USB port. The drivers will be automatically installed.
Install usbreader 1.7.0 from the Public Transport folder:
usbreader_windows_1_7_0.exe
Directory: C:\usbreader
Unzip the Reader configuration file and place the configuration files usbreader.properties and QChessOvcSettings.xml in the folder C:\usbreader.
Double click on c:\usbreader.exe
This will connect the reader to the backend. You should see a green display and the message “Klaar voor gebruik” (Ready to Use).

You will also see a green dot in the system tray. An orange dot indicates a connectivity error. A blue dot indicates “in progress”.

The log file is located in C:\usbreader\log\info.
-
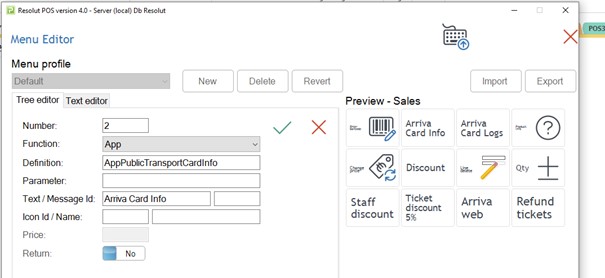
Create buttons in POS4 using the Menu editor
Hold Shift + Right Click on the key button to open the configuration window, and select Menu Editor. Then choose a menu and click Add Button.
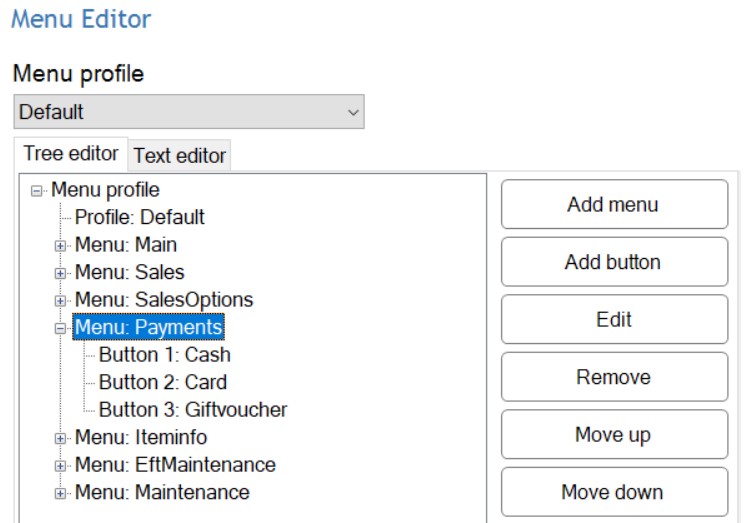
Add the buttons:
“AppPublicTransportCardInfo”
“AppPublicTransportCardLogs”
-
Test the Card reader
- Login to the test company, and start the POS with a card reader
- Place a test card on the card reader
- Click Card info
- The receipt is printed
- Click Log
- The receipt is printed

-
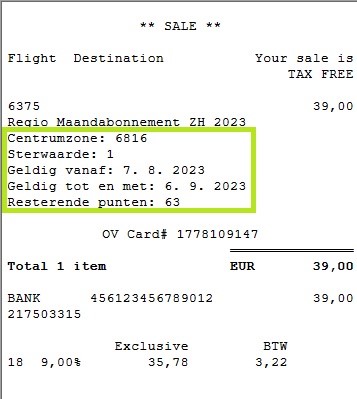
Printing Additonal Information
In order to print additional information for subscription products on the receipt, such as “Centrumzone”, “Star value”, “Valid from”, and “Valid until”, set the parameter PrintItemDescriptionLong to “1”.