Transfers
The Transfer function allows the transfer of stock from one location to another to be managed through the POS4 system.
Setup and requirements
-
Setting up the database:
In the ResolutPOS database add the following lines to the Parameters table:
-
ItemTransfer.AllowCancelTransfer -
ItemTransfer.AllowEnterReference -
ItemTransfer.AllowEditTransfer -
ItemTransfer.AllowQty -
ItemTransfer.InvalidateWrongTransfer -
ItemTransfer.ScanItemsOnReceival -
ItemTransfer.SendingEmployeeCanBook
If items should be scanned on recieval, set
ItemTransfer.ScanItemsOnReceivalto “1”.
If items should not be scanned on recieval, set
ItemTransfer.ScanItemsOnReceivalto “0”.
In the POS database add the “AppItemTransfersV2” line to the ApplicationCommands table.

In the BOS database add the “POS Transfer” line to the “ClientMenu”.

In the BOS database apply patch:
365_PosInventoryList_Patch01.sqlIn the Ticket storage database apply patch:
StockDocumentTable_Patch01.sql -
-
Setting up the Resolut BOS Client
The transfer report module can be added through the menu editor. Go to Menu Editor > New Record and add module code 422.

A cashier that wants to do transfers must be assigned a role that has the POS Transfer access key and Transfer report key allowed. When the access right is synchronized to POS, it will be applied to the user on his next signon to the POS.


-
Setting up in POS4
In the menu editor, the transfer button must be configured.

-
Incorrect transfer notification
When a transfer is incorrect, the user can be notified by email. This can be configured in “PosModuleExporter”. E-mail addresses can be added to the last key.
<appSettings\>

<add key="MailServer_Host" value="mail.bovertis.nl" /\>

<add key="MailServer_Port" value="25" /\>

<add key="MailServer_UserName" value="" /\>

<add key="MailServer_Password" value="" /\>

<add key="ItemTransfer_NotificationsEnabled" value="1" /\>

<add key="ItemTransfer_NotificationsAddresses" value="test1@bovertis.nl , test2@bovertis.nl" /\>

</appSettings\>
Usage
-
Creating a transfer
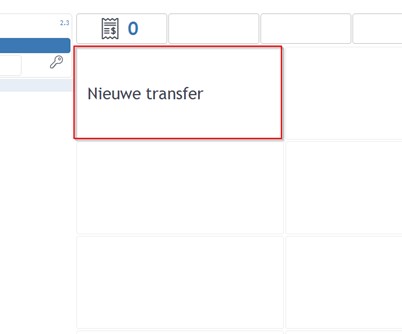
A user with the right to transfer can create a transfer by selecting Transfers > New Transfer

Select a destination store.

Then scan the products with a scanner or manually input the barcode. Lines can be removed.

After confirming the transfer, it is stored and the receipt is printed. The barcode on the bottom will be scanned when receiving the transfer.

-
Cancel a transfer
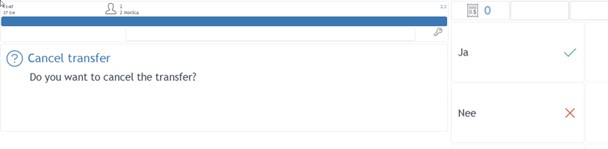
To cancel the transfer before the items are sent to the store, open the transfer module and scan the transfer barcode. The transfer must be canceled in the same shop where it was created. After confirming, the transfer is canceled.
-
Receiving a transfer
Open the transfer module and scan the transfer barcode. If the shop id does not match the destination of the transfer, the transfer is canceled and must be returned to the sending store. If the transfer was already booked or cancelled, a message is shown.
a) Scan items on Recieval
The user must scan all the items and confirm.

When there is a difference the message ‘transfer incorrect, please correct or cancel’ is shown. When the transfer is incorrect, the employee can cancel the transfer and the transfer must be returned to the sending store.

b) Full booking of transfer on Recieval
The user must verify the items in the transfer. If the content matches, the transfer can be booked.

-
Cancel an incorrect transfer (returning)
When a transfer was delivered in the wrong store, or if there was a difference upon delivery, the goods must be returned to the sending store.
In the sending store, open the transfer module and scan the transfer barcode. The POS recognizes that the transfer was created in this store and cancelled in another store, and asks;
“Transfer was delivered to the wrong store. Can you confirm all items returned?”
or
“The receiving store found differences. Can you confirm all items returned?”
When this is confirmed, the transfer is cancelled.

-
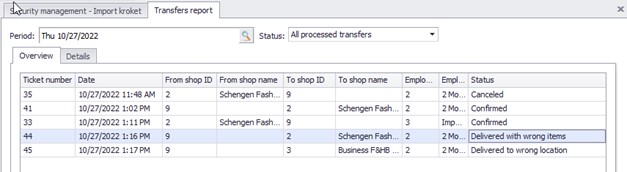
Transfers report
In the ResolutBOS client, in the Transfer report module, the user can see information about finished transfers.